What does the Comments With Credits (CWC) plugin do?
The Comments With Credits plugin allows your members to earn Credits by commenting on your WordPress Pages and Posts, using FaceBook Comments, as well as the commenting system built into WordPress.
You can encourage your members to participate in your community, by rewarding them with credits for commenting on your blog posts. You can configure which posts will give them credits, and how many credits, and this plugin even has built-in security to prevent people from abusing this, and will make sure that they can’t rack up too many points by repeatedly adding junk comments.
Comments With Credits & WCP License Plugin Installation
- Every one of the WickedCoolPlugins requires a valid WCP License Key in order to work.
- Please go to the “Downloads” page in the member’s area and download both WCP License Key Plugin and CWC Plugin ZIP files. You will find your WCP license key on the Downloads page on WickedCoolPlugins.com. Without entering a valid license key, the CWC plugin will not work. You can install these plugins (WCP License Key and CWC) just like any other standard WordPress plugin (via WP admin -> plugins -> Add New -> Upload tab).
- Activate both plugins, and enter your WCP license key under WP Admin – > Settings -> WickedCoolPlugins License section.
- If needed, Click Here for step-by-step installation instructions for the WCP License Key Plugin.
- After you have activated both the CWC and WCP License Plugins, you should see this on your WP Admin > Plugins page.


Comments With Credits => Setup
Step 1.
After you activate the CWC plugin, if you add/edit a WP page / post, you will notice a new CWC editor icon as shown below:
![]()
When you click on the CWC editor icon, it will bring up a CWC configuration page where you can configure CWC options for Facebook comments. But before you do that, you will need this page or post’s URL. So please complete step 2 (see below) and then click on CWC icon.
Step 2.
If it’s a NEW page or post, then before you click on the CWC icon, first add some content on this page, give the page a name and save the page. Then grab the url (permalink) of this page as you will need it on the CWC editor configuration page. If it’s an existing page /post, then make a note of the page url as you will need it on the CWC configuration page.
Step 3.
Please generate Facebook App Id using the following steps (you will need for CWC -> FB integration):
1. In a new browser or tab, please visit the FaceBook Developer page. You will need to log in there using your FaceBook account login info. Then click on Apps => Create New App to create a new FaceBook app.

2. Fill in the App Name and click on Continue
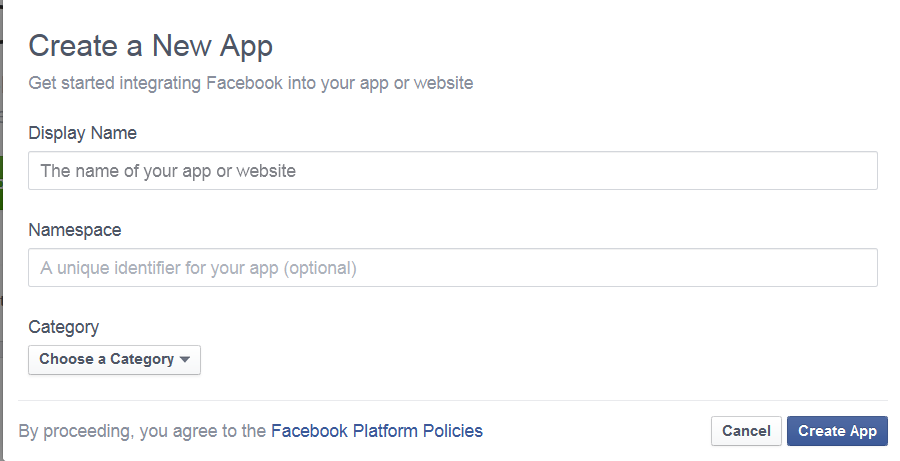
3. Enter the captcha (security code), and click Submit.

4. Make a note of App ID and App Secret
Save the settings, and now go back to WP admin -> Edit Page – > Click on CWC editor/icon.
Step 4.
Now click on the CWC editor icon, it will bring up the CWC configuration page as shown below.
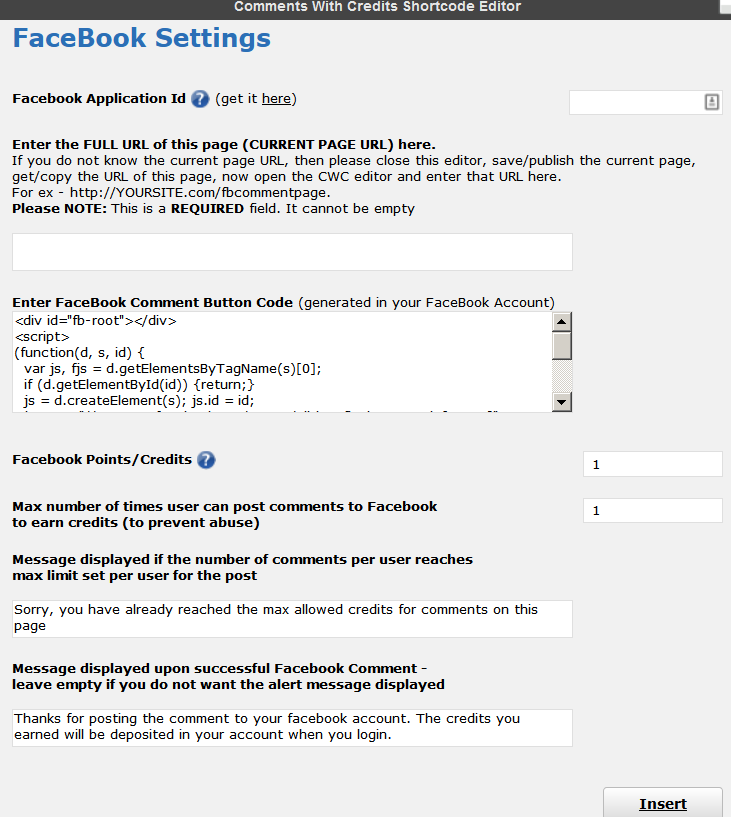
1. Enter the Facebook App Id that got in Step 3.
2. Enter the full URL of the page that you got in Step 2.
3. No need to update the Facebook Comment Button Code text area. You can leave the defaults as is.
4. Set the FB Comment points/credits that the users will be rewarded upon a successful FB comment.
5. Set the max number of times a user can post comments on a given page (to prevent abuse). Default is 1.
6. Click on Insert after you complete the CWC setup. You will notice the CWC shortcode will show up on the WP page. Now you can save the page.
Step 5.
You will notice the following options on the WP page where you configured the CWC options:
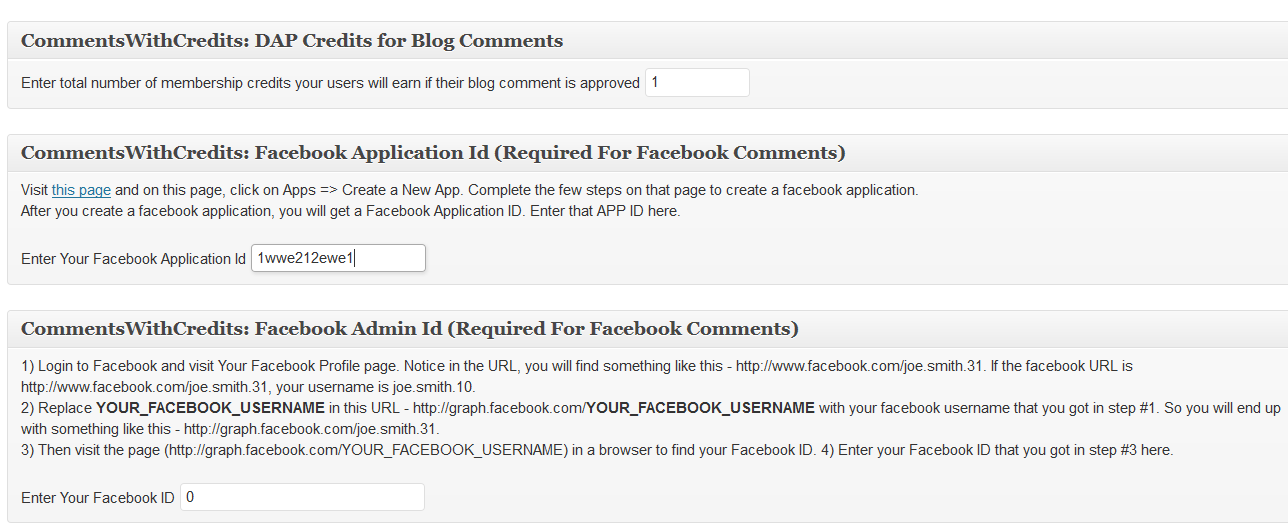
1.
2. Also enter the Facebook App Id that you got in Step 3.
3. Follow the following steps to get your Facebook admin id.
– Login to Facebook and visit Your Facebook Profile page. Notice in the URL, you will find something like this – http://www.facebook.com/joe.smith.31. If the facebook URL is http://www.facebook.com/joe.smith.31, your username is joe.smith.10.
– Replace YOUR_FACEBOOK_USERNAME in this URL – http://graph.facebook.com/YOUR_FACEBOOK_USERNAME with your facebook username that you got in step #1. So you will end up with something like this – http://graph.facebook.com/joe.smith.31.
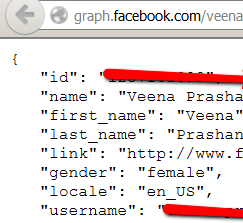
– Then visit the page (http://graph.facebook.com/YOUR_FACEBOOK_USERNAME) in a browser to find your Facebook ID.
That’s it. Now save/publish the WP page as you have already configured the CWC editor/icon options and the CWC options on the page. You can visit this page in a browser and you will see the Facebook comment option. You can login as a member to DAP and then do facebook comment to earn instant credits. Or you can complete Facebook comments and the credits will be stored in a cookie. When you login to your membership next on this browser, the credits will be assigned.
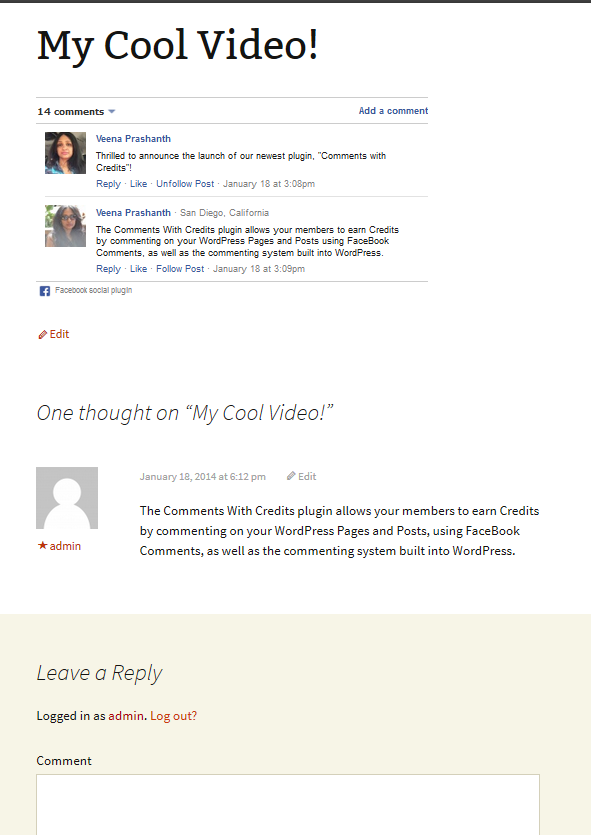
User Experience
When your users visit this page, they will can add both facebook comments as well as blog comments.
They will received credits for ‘approved’ blog comments and for successful facebook comment.
ADMIN REPORTING
You can go to DAP admin -> Credit Store -> Manage Social Credits page as shown below:
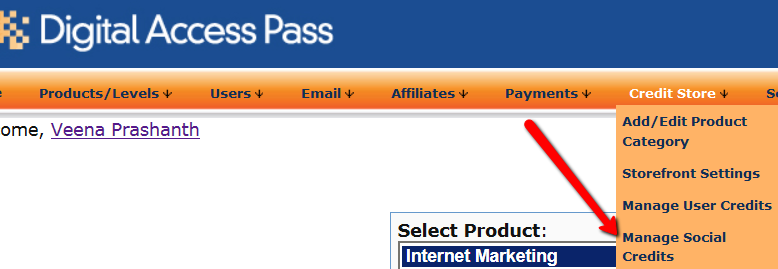
Click on Manage Social Credits to view the credits report per user as shown below:
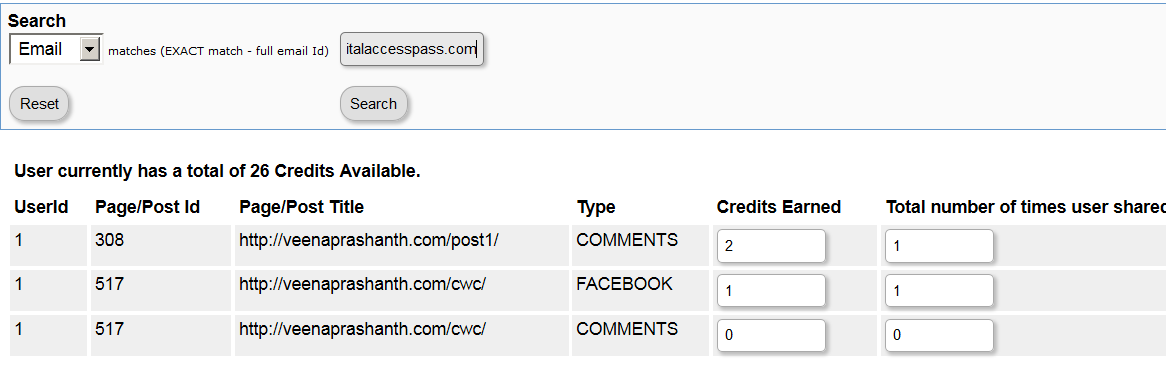
This will give you full history of comments event per user.